 |
Eyeglasses | |
|
Eyeglasses | |
As with all these designs, try to start with relatively clean, crisp bills. It will go much easier. All folds should be sharply creased. It helps to go over the fold with a fingernail on a flat, hard surface.
This design requires five bills.
I suggest that you read through all the instructions before starting. Doing so should help you in understanding the orientations of the pieces that will be put together.
(I used a Casio QV-10A digital camera to get the images. I've tried to reduce the resolution of the JPEGs to the very minimum required to minimize your download time, but it is still graphics-heavy.)
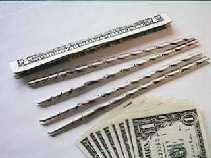
Start by rolling up four of the bills into tight tubes (as explained here).
Then fold the remaining bill exactly in half lengthwise, twice.
Now you have the pieces.
In the following sections, there are several places where the instructions will specifically say to use one end of one of the tubes. Pay attention to this, as several steps will not work unless you have used the correct ends.
| "outside end" | "inside end" | |
|---|---|---|
The end of the rolled bill on the left side of the picture is the end where the wrap ends. For simplicity, I'll refer to this below as the outside end. The end to the right will be called the inside end.
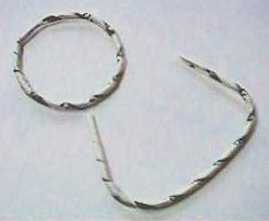
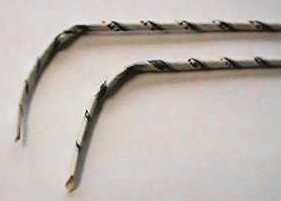 Two of the tubes will make the earpieces
for the glasses. For each, take the outside end and bend about
1 and 3/4 inches in an arc as shown.
Two of the tubes will make the earpieces
for the glasses. For each, take the outside end and bend about
1 and 3/4 inches in an arc as shown.
 On the inside end of the earpiece tubes, flatten out about 5/8ths of an
inch of the tube, and then sharply make a right angle with the flat
portion. Make the two go in opposite directions. These tabs will be
used to attach to the rims.
On the inside end of the earpiece tubes, flatten out about 5/8ths of an
inch of the tube, and then sharply make a right angle with the flat
portion. Make the two go in opposite directions. These tabs will be
used to attach to the rims.
 Each of the two remaining unused tubes will become a "rim".
On each of these, pinch down about 1/2 of inch
of the inside end.
Each of the two remaining unused tubes will become a "rim".
On each of these, pinch down about 1/2 of inch
of the inside end.
Flattenning the end, and then creasing the flat portion into a V shape
works nicely. (The point is to make this end small enough to be
inserted in the opposite end, as described in the next step.)
 Roll each of the rim tubes into a circular shape, and insert the inside
end into the outside end. Jam the inside end in far enough and hard
enough that it will not slip back out.
Roll each of the rim tubes into a circular shape, and insert the inside
end into the outside end. Jam the inside end in far enough and hard
enough that it will not slip back out.
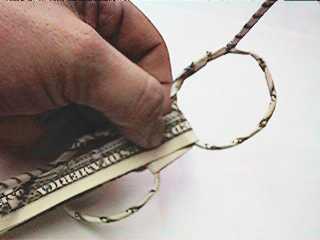
 Carefully start unwrapping the rim tubes. It helps to squash the circular
shape to a very ellipical shape while doing this. Do not disturb the wrap
any more than necessary to achieve this - you want this to be able to
re-wrap tightly. Unwrap about two layers as shown at top.
Carefully start unwrapping the rim tubes. It helps to squash the circular
shape to a very ellipical shape while doing this. Do not disturb the wrap
any more than necessary to achieve this - you want this to be able to
re-wrap tightly. Unwrap about two layers as shown at top.
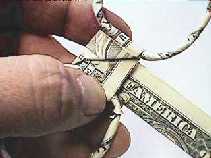
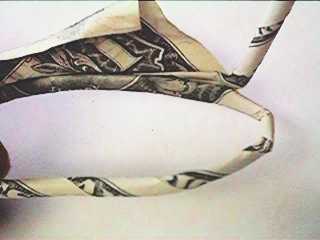 Where you have unwrapped the rim tube, insert the tab on the inside end
of one of the earpiece tabs. Not shown in this close-up, the earpiece
outside end would be "down" in this orientation. (See next
illustration.)
Where you have unwrapped the rim tube, insert the tab on the inside end
of one of the earpiece tabs. Not shown in this close-up, the earpiece
outside end would be "down" in this orientation. (See next
illustration.)
Re-wrap the end of the rim around tightly to capture the tab from the
earpiece tube. Restoring the rim tube to a circular shape after re-wrapping
will help prevent this from unwrapping again.
 Repeat the step above for the other rim & earpiece, but sticking out
the opposite side. You now have two complementary sides. The remaining
bill will become the nosepiece/bridge to hold the two sides
together.
Repeat the step above for the other rim & earpiece, but sticking out
the opposite side. You now have two complementary sides. The remaining
bill will become the nosepiece/bridge to hold the two sides
together.
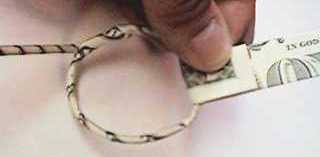 Start by looping about 3/4ths of an inch of the flat bill around one of
the rims. Do this with the earpiece sticking towards you and the outside
of the flat bill (white border) on the outside of this wrap.
Start by looping about 3/4ths of an inch of the flat bill around one of
the rims. Do this with the earpiece sticking towards you and the outside
of the flat bill (white border) on the outside of this wrap.
 Slip the other rim over the long end of the flat bill, making sure the
earpiece is in the right orientation.
Slip the other rim over the long end of the flat bill, making sure the
earpiece is in the right orientation.
(I've skewed this slightly in the illustration for clairity. You really
want this to wrap straight over top of the previous step.)
 Fold the end of the flat bill so that it now forms a right angle to the
previous wraps. The spacing between the rims should be just wide
enough to allow for the flat bill to wrap in this orientation (see next step).
If not, do not continue. Go back and adjust the initial folds of the flat
bill so that this will be properly spaced.
Fold the end of the flat bill so that it now forms a right angle to the
previous wraps. The spacing between the rims should be just wide
enough to allow for the flat bill to wrap in this orientation (see next step).
If not, do not continue. Go back and adjust the initial folds of the flat
bill so that this will be properly spaced.
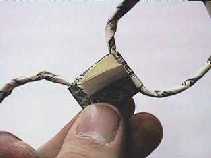
 Wrap the remainder of the bill around underneath. Make this tight.
If you don't get this part tight, the whole thing will fall apart about
thirty seconds after you've completed it.
Wrap the remainder of the bill around underneath. Make this tight.
If you don't get this part tight, the whole thing will fall apart about
thirty seconds after you've completed it.
 Continue wrapping the remainder around tightly. If you have closely followed
the previous steps, the remainder should end up on the same side of the rims
as the earpieces. It is not terribly important, but having it end up on this
side will hide the next little tuck...
Continue wrapping the remainder around tightly. If you have closely followed
the previous steps, the remainder should end up on the same side of the rims
as the earpieces. It is not terribly important, but having it end up on this
side will hide the next little tuck...
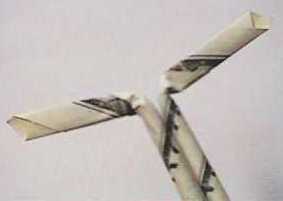
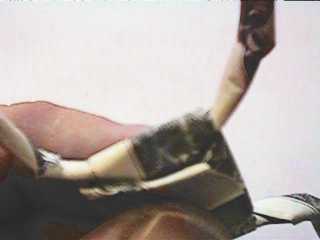 Skew the end slightly to one side, and tuck what you can under the
previous wrap as shown. If you have wrapped the "nosepiece"
tightly enough, this will keep it all together.
Skew the end slightly to one side, and tuck what you can under the
previous wrap as shown. If you have wrapped the "nosepiece"
tightly enough, this will keep it all together.
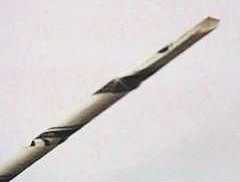
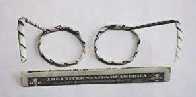
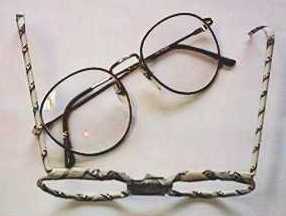 Well, that's about it. As you can see from this picture, which includes
my real eyeglasses, this design is just about life-size.
Well, that's about it. As you can see from this picture, which includes
my real eyeglasses, this design is just about life-size.
Don't be too surprized if your first attempt at this design doesn't
come out looking quite as neat as the illustrations. I've probably
done hundreds of these over the years, and it takes a while to get
used to getting them "just so".