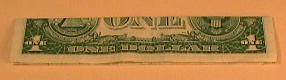
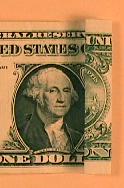
Start by folding exactly in half lengthwise so that the reverse face is outside. (The green of the greenback is the right color for the tree.)
Xmas Tree
Okay, this isn't the greatest, but I get a lot of requests for it, so here goes. This is as attractive as those pine scent cutouts you see hanging from people's rear-view mirrors and apparently as poplular.
I'd suggest that you look through all the instructions before attempting to follow along - it will give you a better idea of why you are doing specific things, and how these affect the final appearance.
Start by folding exactly in half lengthwise so that the reverse face
is outside. (The green of the greenback is the right color for the
tree.)
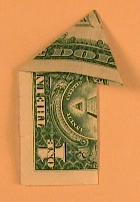
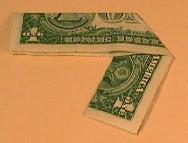 From the left-to-right center, fold one corner under at approximately
the angle shown. This will be called the side fold, and will
appear later in these instructions.
From the left-to-right center, fold one corner under at approximately
the angle shown. This will be called the side fold, and will
appear later in these instructions.
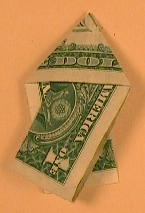 Fold the opposite side under in the same way from the other side (another
side fold). The triangle formed on the upper layer is all that is
going to be showing (from the front) when we have completed this
piece.
Fold the opposite side under in the same way from the other side (another
side fold). The triangle formed on the upper layer is all that is
going to be showing (from the front) when we have completed this
piece.
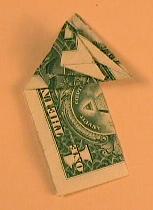
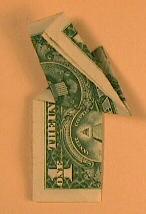 Fold one of the two flaps even with the bottom edge of the bill over the
triangle as shown. I will refer to this fold as the bottom fold,
and will refer to it in the next step.
Fold one of the two flaps even with the bottom edge of the bill over the
triangle as shown. I will refer to this fold as the bottom fold,
and will refer to it in the next step.
 Continue to fold the remainder in any way desired so that it fits
within the boundaries of the triangle. Since this will all be hidden
from view, neatness doesn't count. Do try to minimize the number of
folds and overall thickness of this section - it will help
later.
Continue to fold the remainder in any way desired so that it fits
within the boundaries of the triangle. Since this will all be hidden
from view, neatness doesn't count. Do try to minimize the number of
folds and overall thickness of this section - it will help
later.
 When the entire tab will fit within the triangle, open the bottom
fold, then the side fold for this side. Reclose the bottom
fold first, then the side fold. This will hide the other
(ugly) folds used to make the tab fit within the borders of the triangle.
When the entire tab will fit within the triangle, open the bottom
fold, then the side fold for this side. Reclose the bottom
fold first, then the side fold. This will hide the other
(ugly) folds used to make the tab fit within the borders of the triangle.
Repeat the previous step for the other tab.
This time
after opening the bottom and side folds, tuck the remainder of this
tab between the front of the triangle and the other tab's bottom fold.
This will lock the two in place.
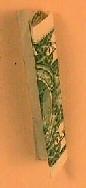
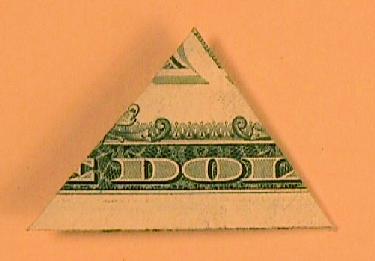 When complete, it should look approximately like this.
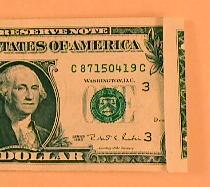
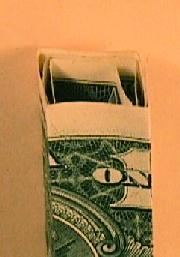
Now take two more bills, and fold them approximately two-thirds and one-fourth of the way lengthwise. Repeat steps 2, 3, and 4 for each of these bills to create two more triangles that are different sizes. (This picture shows the opposite side as shown in step 2.)

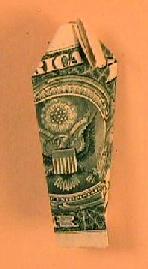
When you have finished, you will have three triangles that are different sizes. This picture shows three of them from the back side.

 Now take the three sections and insert the top point of the two larger
ones in between the front bottom and bottom fold of the next smaller section.
Don't push the sections too tightly together.
If your folds are reasonably tight, the whole thing will stay together.
Now take the three sections and insert the top point of the two larger
ones in between the front bottom and bottom fold of the next smaller section.
Don't push the sections too tightly together.
If your folds are reasonably tight, the whole thing will stay together.
One more thing...a tree stand.
Take another bill and fold over about one third to one half inch of the end. Fold over again and again, making a nearly flat roll out of the entire bill.
 Unroll the flat roll you just made. Reroll it in a square roll, using
the creases you made in the previous step as a guide. When rerolling
this section, it will help sharpen the outer creases as you reroll to
make a tighter square.
Unroll the flat roll you just made. Reroll it in a square roll, using
the creases you made in the previous step as a guide. When rerolling
this section, it will help sharpen the outer creases as you reroll to
make a tighter square.
 Flatten out one end keeping the other end square. On the flat end,
fold the two corners in toward the center line as shown. This pointy
end will get inserted in the largest triangle made in the previous
steps, and become the trunk/tree stand.
Flatten out one end keeping the other end square. On the flat end,
fold the two corners in toward the center line as shown. This pointy
end will get inserted in the largest triangle made in the previous
steps, and become the trunk/tree stand.
That's all folks!
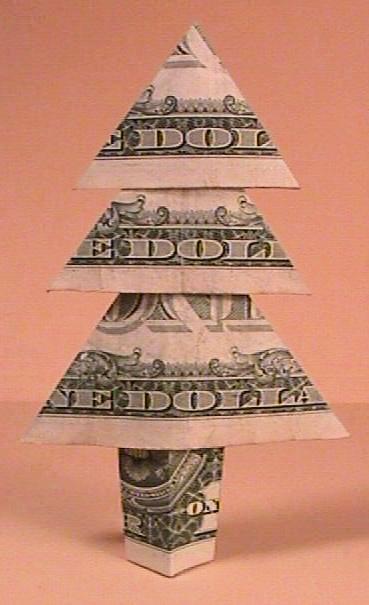
These things will stand up on their own, provided that you carefully stack them, and bend the upper portion of the trunk slightly forward or backward to achieve the correct balance. If someone else wants to come up with a better tree stand, knock yourself out.
Okay, these pictures aren't of the nicest tree I've ever made. (I was in a hurry to get this page together and up in time for Christmas.) Some thoughts:
Experiment on your own, and you shouldn't have too much trouble making it nicer looking than the one in these pictures.
Back